Paths in Photoshop Tutorial
Compatibility:
Photoshop 7 to current version

This tutorial will walk you through how to use Paths in Photoshop. It explains the general workings of paths, as well as how to use them to do specific tasks. Such as how to create vector shapes using paths, how to replicate and resize something as large as you’d like, how to use a brush along a path and have it fade out or get smaller as it goes, etc.
1. Open up a new file (File > New). Make it 500 by 500 pixels. The resolution should be 72, Color Mode should be RGB, and Background Contents should be white.
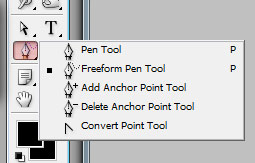
2.Click on the Freeform Pen Tool. It looks like the image to the right. If it’s not showing, right click on that square and choose it from the list.

Along the top, just under the main menu, ensure that the “Paths” button is selected. This will allow you to make a path without creating a shape (shapes are automatically filled in, we don’t want that).
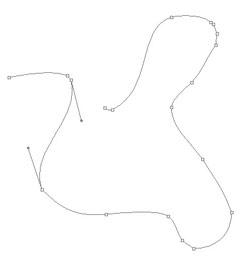
3.Click and draw on your canvas like you would with your brush tool if you were painting something. You’re doing much the same thing, but instead of actually painting anything, you’re creating a path.
Think of a path as a blueprint for where your paint WILL go. You’re creating a shape or line or whatever you like… but you get a chance to shape it before you actually put any paint down.
This squiggle to the right is what I drew. You can see the line, as well as all of the points along the line where it curves.

4.Click on the Direct Selection Tool, which is right above the Freeform Pen Tool. (Again, if it’s not showing, right click on that box and choose it from the list.)
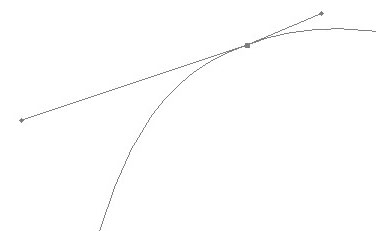
5.Zoom in close to a part of the path where there is a point. Using the Direct Selection tool, click on that point. You’ll see two lines coming out either side of it, much like you see here.
Those two lines represent the curvature of the path around that point. If I were to move the right line up a few pixels….
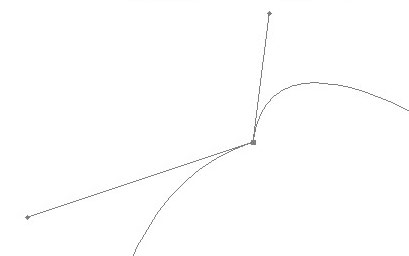
6.… notice what happens to the curve. It curves upward, but just on that side of the point.
I did that with the Direct Selection Tool. Just grab that point on the end of the line and drag. You can also click on the path itself and drag it, but I find it much easier to manipulate using the two lines.
Play around with yours now. Using your Direct Selection Tool, grab the tip of one of those lines and move it around, watching what happens to the path. See how it changes the curvature?
That’s the basic concept behind paths. Now, I’m going to show you a practical application of it.

7.This is one of the snowflake shapes from our Holidays brush set. I’ve vectorized it, to make it easier to use with this tutorial.
Open up the image of the shape that you’d like to use. If you want to follow along with the same shape, feel free to right click and “Save As..” the image to the right, then open it in Photoshop.
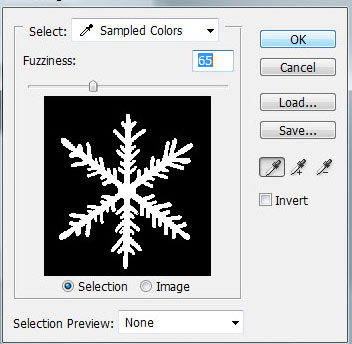
8.The first thing you’re going to want to do is select that black shape. If your shape isn’t all black, fear not. We’re going to use Select > Color Range to make our selection. Click somewhere in the shape, and then slide that Fuzziness bar to the left or right. If your shape has a lot of grays in it, your bar will need to be more to the right. Just make sure that the background stays all black in the preview image. You don’t want to select any of the background!
Your snowflake (or whatever shape you chose) should now be selected.
9.Now, to make that selection into a path.
In the same window as your Layers Palette, there’s a tab called “Paths” – Click on it. (If your Layers Palette isn’t showing, hit F7 to reveal it.)
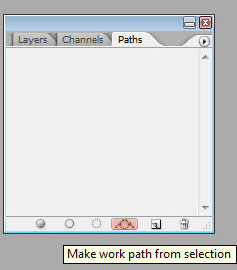
Down at the bottom, there’s several buttons. You’re going to want to click on the one that I have highlighted in the image to the right. “Make work path from selection,” it’s called. Appropriately, since that’s exactly what we’re doing here… making a path out of a selection. You should see your selection change into one of those paths that we were playing with earlier. (You maybe can’t see it very well yet – we’ll see it more in the next step.)
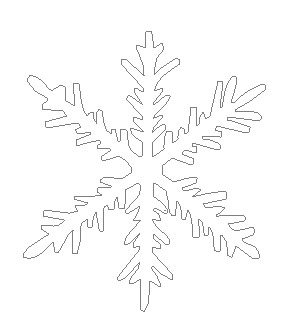
10.Click back on the Layers tab. Click on the “Create a New Layer” tab to create a new layer on top of the other one, and choose white as a foreground color. Then, using your Paint Bucket tool, fill in the canvas with white. You should see something like this.
That’s your path! Now, Photoshop’s “Make work path from selection” tool isn’t perfect. You’ll see some differences. That’s where your training from earlier will come in. You can now shape that path just like we did before. Zoom into it so that you can see those points a bit better, then use your Direct Selection Tool to move around the lines or path until it’s in the shape that you want! There shouldn’t be TOO terribly many errors to fix, but you’ll find that sometimes it tends to try to make lines straighter than they actually are.
For this tutorial, because I don’t need to be perfect, I’m going to just leave mine with what it came up with.
11.That’s still just a path, though, right? We need to make it into something more substantial.
Let’s make a new layer on top of that white one by clicking on “Create a New Layer” in the layers palette again. Now, click back on the “Paths” tab at the top.
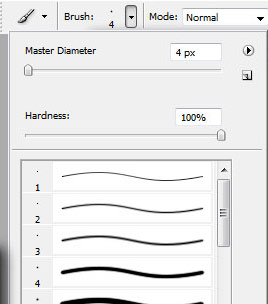
Select a paint brush. Click on the brush selection tool, then select a plain old round brush… say 4px or so in size. Like I have here.
Choose black for your foreground color, or whatever color you want this shape to be.
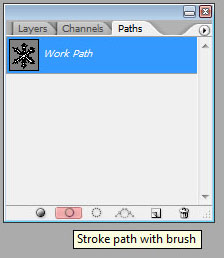
12.Make sure that the path is still selected (see how mine is highlighted blue? – if it’s not, click on it).
Then click on the “Stroke Path with Brush” button, as I have highlighted here. This will paint along that path, using the 4px brush that you selected. Click below the path in the empty area to deselect it. This will give you a better look at your handiwork.
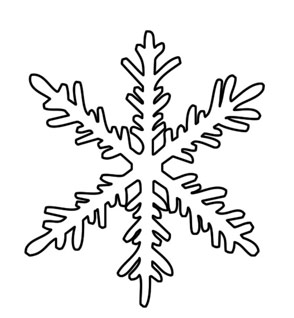
13.You should now have a shape that looks something like this. It will be an outline of whatever your original shape was.

Filling it in is easy enough, if you choose to do so.
Using your Magic Wand tool, click within the shape. Choose Select > Modify > Expand and expand that selection by 1 pixel. (This helps make sure that there are no gaps at all between the outline and the filled in portion.) Create a new layer, and using the Paint Bucket tool, click on the canvas to fill in the selection. You should now have a solid shape that is very close to your original image.
14. What in the world is the use of that, you might ask? Well, that works for any shape with a white background. If it wasn’t solid black, you can make it so by using these steps. You’ll be “vectorizing” it, so to speak.
Why else? Well, one of the biggest uses for this that I’m finding is for resizing. The original version of the Tribals brush set was SOOOO tiny and SOOOO poorly made, compared to the standards that I hold myself to today. It was one of my first sets. I’ve since remade it, and now they’re huge and very high resolution. How? Because you can resize paths without any loss of quality or change to shape. So, just before step 12 (where you use your brush tool to paint along the path), I can resize my canvas to 5000 pixels tall/wide if I want to.
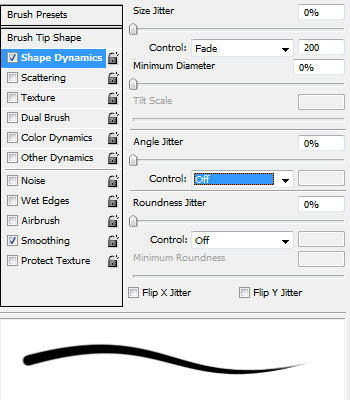
15.Another great thing about these paths is that when you paint along them, they go in the direction that you painted them. So, if you want to use brush techniques that fade out as you go along, they work with paths! For example…
If I want to make a swirl where the brush size gets smaller as you get in towards the center, you can use brush settings like these to help you accomplish that. See the stroke on the bottom, and how it diminishes in size as it goes? Make sure that all of the settings under Shape Dynamics are to 0 or off except for Size Control. Set it to “Fade” and then put in a number next to it. The number beside it represents the number of pixels that the brush will continue to paint for before it fades out completely.
You can check out my jaggedy, Nightmare Before Christmas looking swirl on the left below!
This also works GREAT for hair, by the way. Draw your hair as paths, making sure that you’re drawing the strands in the same way each time. Then “Stroke path with brush” along them to create some really great looking hair. See the sample below and to the right for a small example of what you could create. (In this hair example, I also used the “Other Dynamics” brush settings as follows: all set to 0% or off other than Opacity Control, which is set to “Fade” and then the same number as was put into Size Control is added to its right. This makes it fade off into nothingness as its size is reduced.)
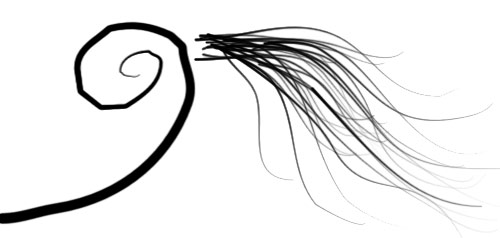
These are just a few small examples of what you can do with Photoshop’s paths. They really are quite versatile, and handy for people that may not have a graphics tablet and want to draw non-jagged lines! A tip, as far as that is concerned:
The less points along a path, the smoother that path or line will be. If you need to delete a point somewhere along the way, right click on that point and choose “Delete Anchor Point.” The line may move a bit when you do so, but you can always move it back to how you wanted it. And when you do, you’ll find that it looks much smoother!
That’s it! I hope that you’ve enjoyed this tutorial, and I hope that it answers some of your questions about how to use paths in Photoshop. If you have any questions, don’t hesitate to ask!